Graph Partitioning
Introduction
A partition is an assignment of a graph's vertices to 2 or more sets such that the number of edges between sets (cut size), is as small as possible, and the sets contain roughly equal numbers of vertices. The two parameters alpha and beta_obj can be used to change the relative importance of minimizing the cut size and making the partitions equally sized, respectively.
Note that graph partitioning aims to find equally sized partitions, while unipartite-community-detection (and bipartite-community-detection) does not. Hence the figure below and the similar figure on the community detection page are slightly different.
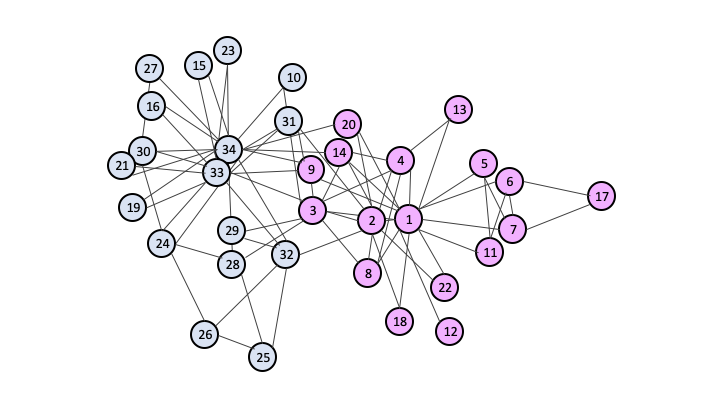
The figure below is an illustration of the Zachary Karate Club social interactions [GN]
and the partition created by the partition algorithm [UMNM].
Running a Graph Partitioning job
Download a local copy of a Jupyter notebook with a graph partitioning example
Input data
To upload an undirected graph, we encode it in a NetworkX graph
1
G = nx.random_geometric_graph(n=3, radius=0.4, dim=2, seed=518) .Alternatively, we encode it in a square symmetric matrix, in which we encode it in a sparse matrix format as shown below. We use Numpy array notation.
1
A = np.array([[0, -1.5, 0.5], [-1.5, 0, 0], [0.5, 0, 0]]) ,API format
We encode the above in a sparse dictionary format for the upload step to the API:
1234567891011121314151617181920212223242526272829303132333435363738
graph_data = {
 "directed": false,
 "multigraph": false,
 "graph": {},
 "nodes": [{"id": 0}, {"id": 1}, {"id": 2}]
  "links": [
    {
      "source": 0,
      "target": 1,
      "weight": -1.5
    },
    {
      "source": 0,
      "target": 2,
      "weight": 0.5
    },
    {
      "source": 1,
      "target": 0,
      "weight": -1.5
    },
    {
      "source": 2,
      "target": 0,
      "weight": 0.5
    }
  ],
  "params" :
    {
       "alpha": 3,
       "beta_obj": 4,
       "sampler_type": "eqc1",
       "n_samples": 10
    },
  "file_name": "graph.json", # can be any short string
  "num_variables": 3, # number of rows
  "file_type": "graph" # defines the data type, 'graph' in this case
}Uploading
First, import the necessary packages:
123
import json
from qci_client import QciClient
qci = QciClient()Now we can upload the various files using the client. Suppose we store the data in a variable
data. Then we call upload_file to push the data to the server.12
response_json = qci.upload_file(graph_data)
file_id = response_json["file_id"]We can extract the
file_id for later use. Triggering a job to run requires the file_id to tell the backend which data to use. We cover this step in the Running tab.